
When the Chromecast first came out about a year ago, developers were quick to find a way to root the streaming device. Google was almost as fast, however, in updating the Chromecast's firmware to close the loophole that this method used.
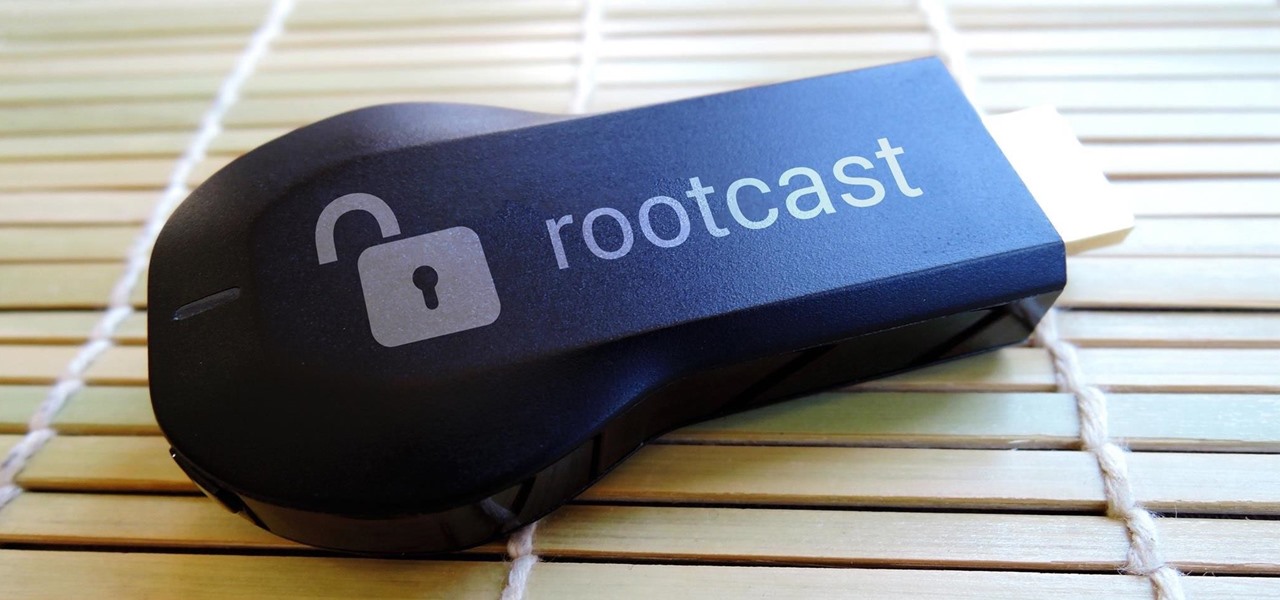
Recently, the developers at Team Eureka uncovered a new exploit that will allow users to root their Chromecast regardless of the firmware version. Not only does this method root the device, it also installs Eureka's custom ROM, allowing for tweaks and customizations like changing your DNS addresses to open up access to region-locked streaming content.
This method requires a few pieces of hardware, so you'll have to shell out a few bucks if you want to mod your Chromecast. But if you're up for it, I'll break down the process in detail below.
Step 1: Gather Your Materials
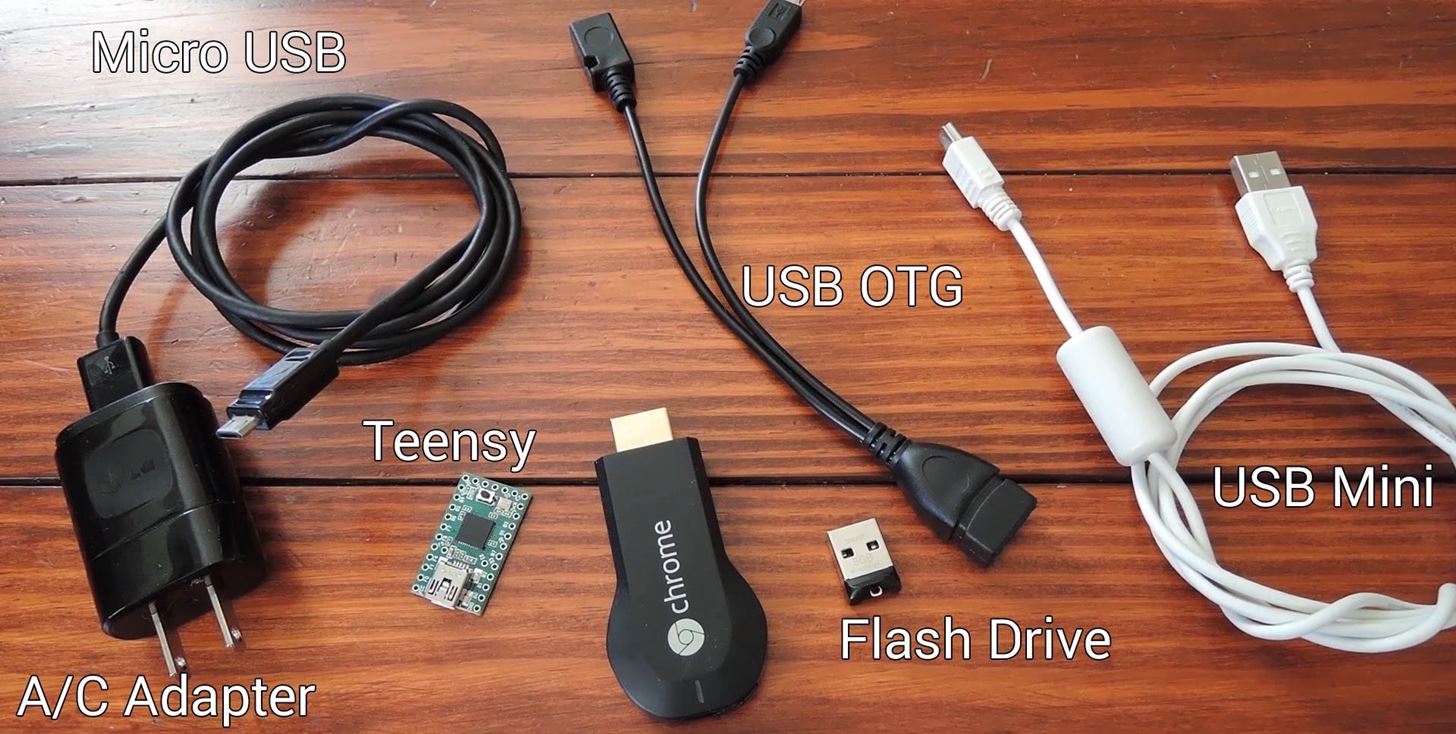
First and foremost, you'll need to purchase a Teensy development board. Two versions are compatible with this root method: Teensy 2.0 & Teensy++ 2.0. I'd recommend the former, as it's cheaper. The regular Teensy 2.0 can be purchased at this link for $16, and the Teensy++ can be purchased here for $24.
While you're waiting on that to come in the mail, you'll need to get an externally-powered USB OTG cable. This differs from a regular USB OTG (or "On-The-Go") in that it is capable of accepting a power supply. These are available on Amazon starting at roughly $2.
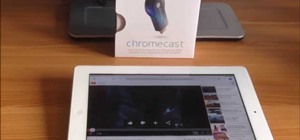
Additionally, you'll also need to have a USB flash drive with at least 1 GB of storage space. If you don't have one of these lying around, here's one for about $12 that you can get from Amazon.
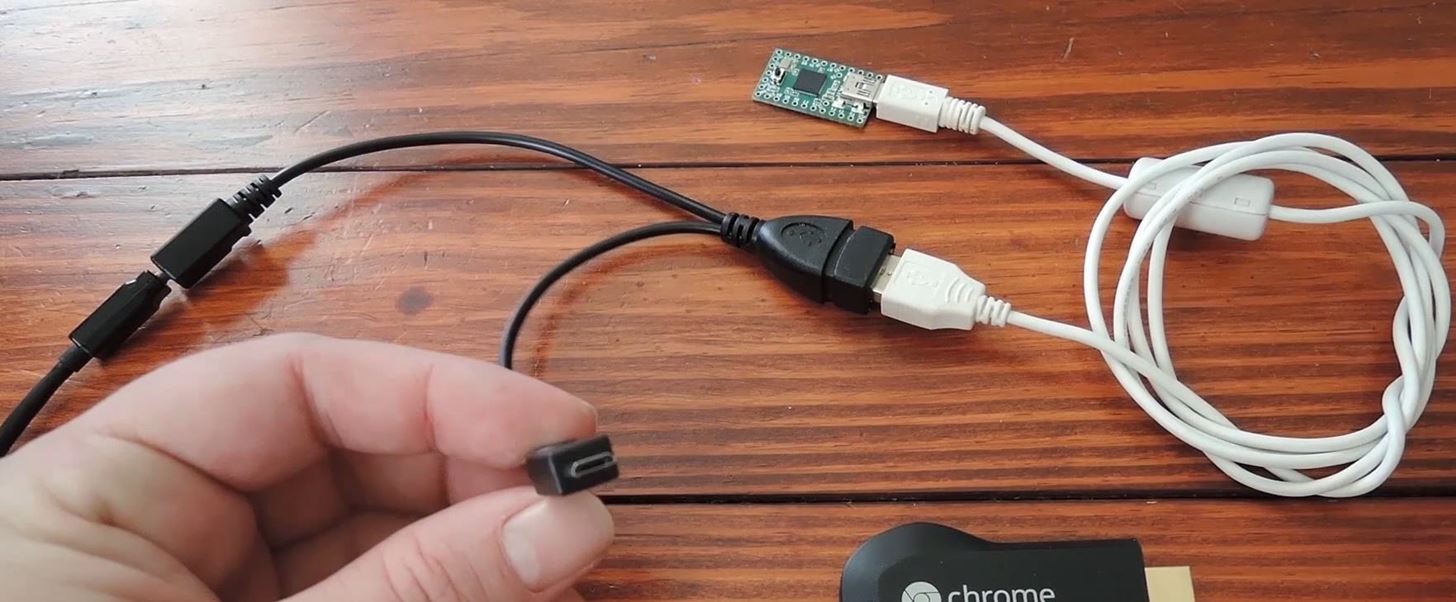
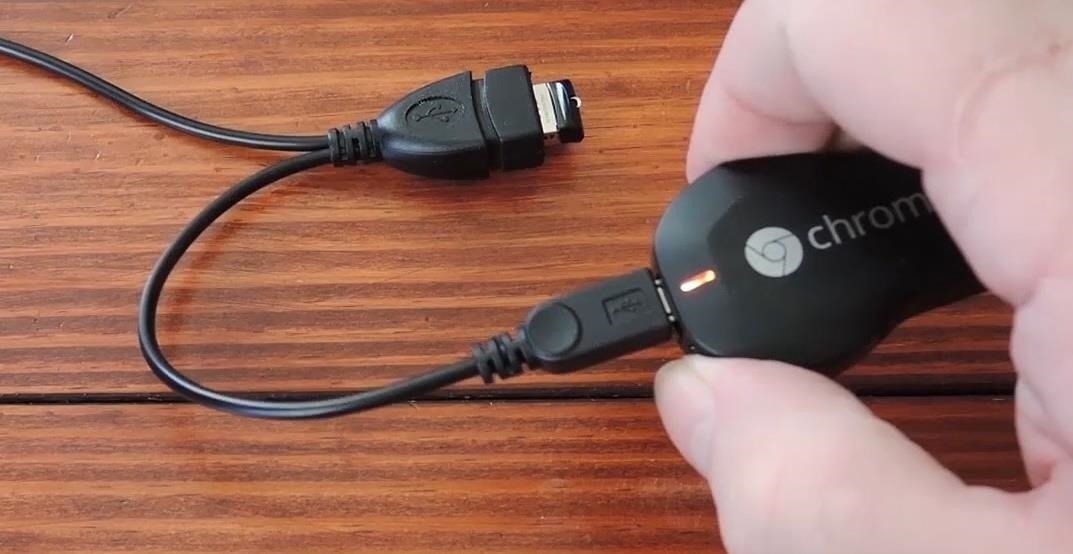
Finally, you'll need two common USB cables. One being a Micro USB (the one that came with your Chromecast will work), and the other a USB Mini cable. You'll also need an AC adapter for the Micro USB cable, but again, the one that came with your Chromecast will do the trick.
All-in-all, your cache of cables should look something like this:
Step 2: Install FlashCast on the USB Drive
The Teensy will be used to downgrade the bootloader on your Chomecast to a version that is capable of rooting, but the actual rooting will be done with the FlashCast on the USB drive.
Plug your USB flash drive into a Windows PC, then download 2 files. The first, which contains all of the rooting files, can be found at this link. Once downloaded, extract the files in the ZIP to a folder on your PC that you can get to easily.
The second file is what you'll be using to install FlashCast on the USB drive. This software is called Win32DiskImager, and it can be found at this link. Once downloaded, run the file, then follow the prompts for installation.
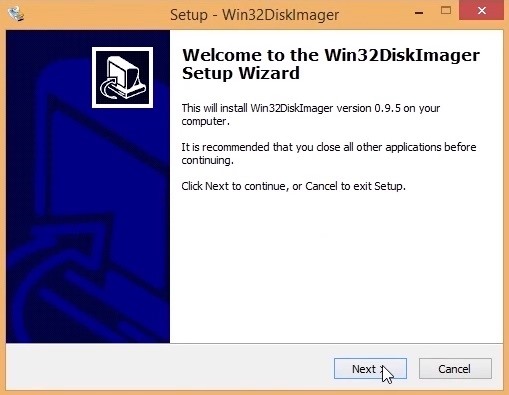
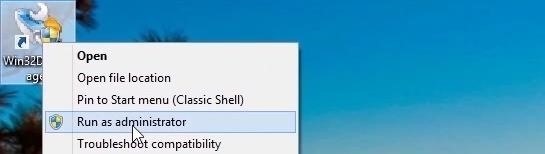
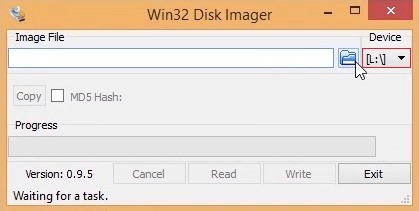
When installation has finished, right-click the Win32DiskImager program icon and select Run as Administrator.
From here, make sure that the Drive Letter selected matches that of your USB flash drive, then click the Folder icon.
Use the next screen to browse to the HubCap folder that you extracted from the ZIP earlier, then use the drop menu at the bottom-right to change the file type to "*.*".
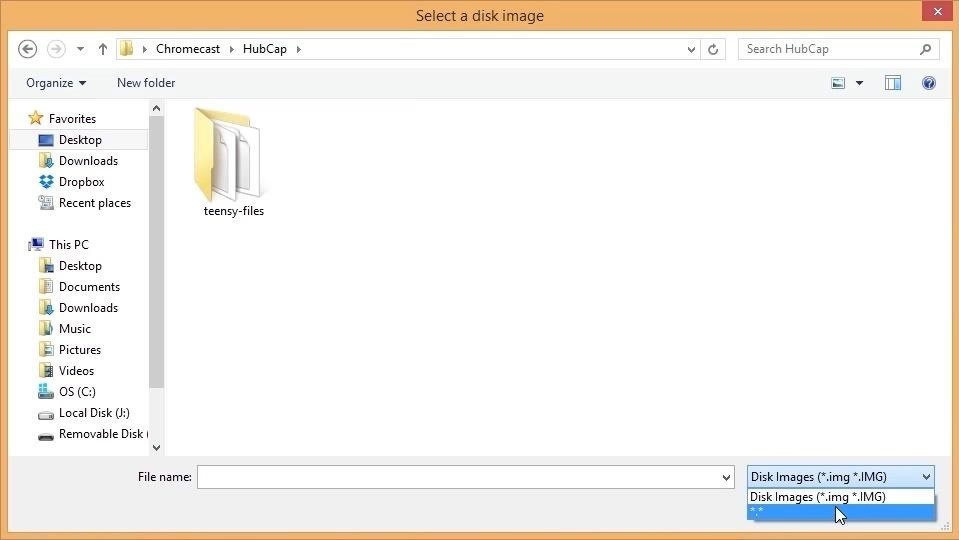
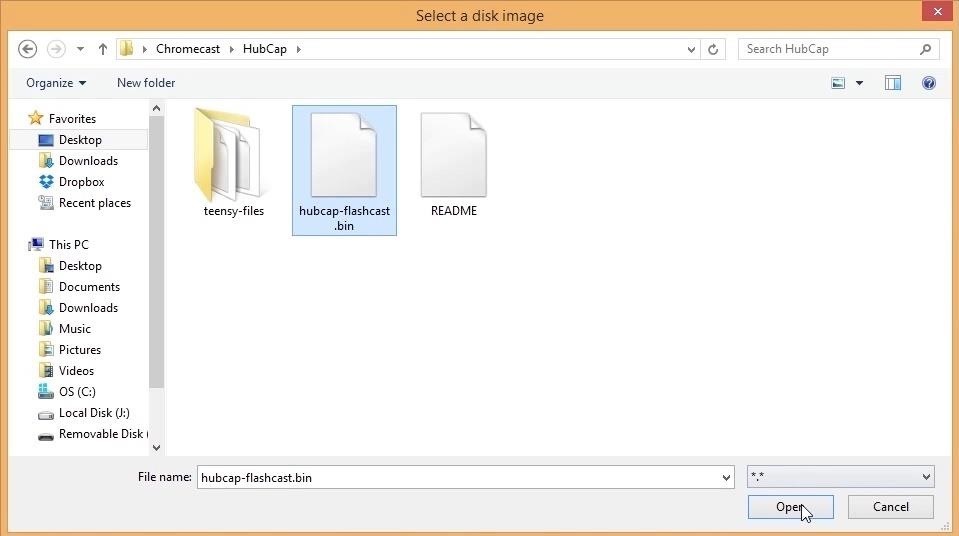
This will expose two new files in this menu, so select hubcap-flashcast.bin, then click Open.
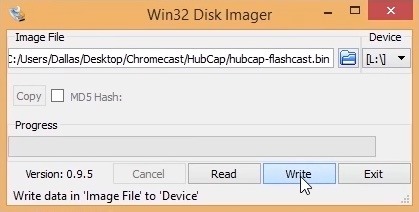
With FlashCast now loaded up in Win32DiskImager, click the Write button, then hit Yes on the following menu.
When it's done, head to My Computer or This PC (depending on your Windows version), then right-click the flash drive and select Eject.
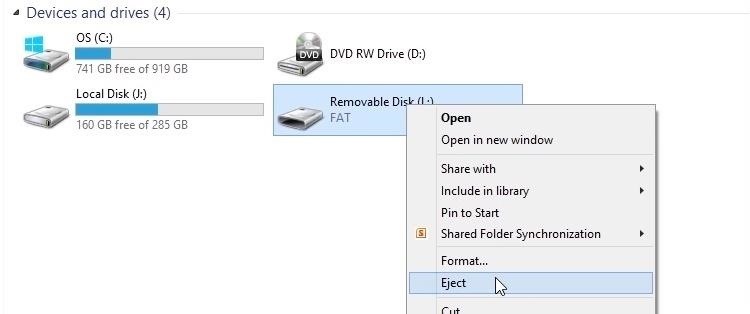
With that out of the way, you can remove the flash drive from your computer and proceed to the next step.
Step 3: Install HubCap on the Teensy
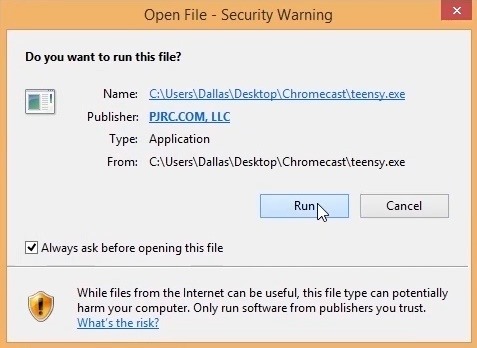
Now it's time to load up the Teensy. Use your USB Mini cable to connect the Teensy to your PC, then click this link to download the Teensy Loader software. Once downloaded, open the file and click Run.
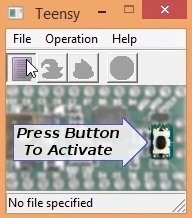
On the tiny little window that pops up, hit the first button on the left to load the HubCap file.
From here, browse to that HubCap folder again, but this time, dip into the Teensy Files folder inside of it.
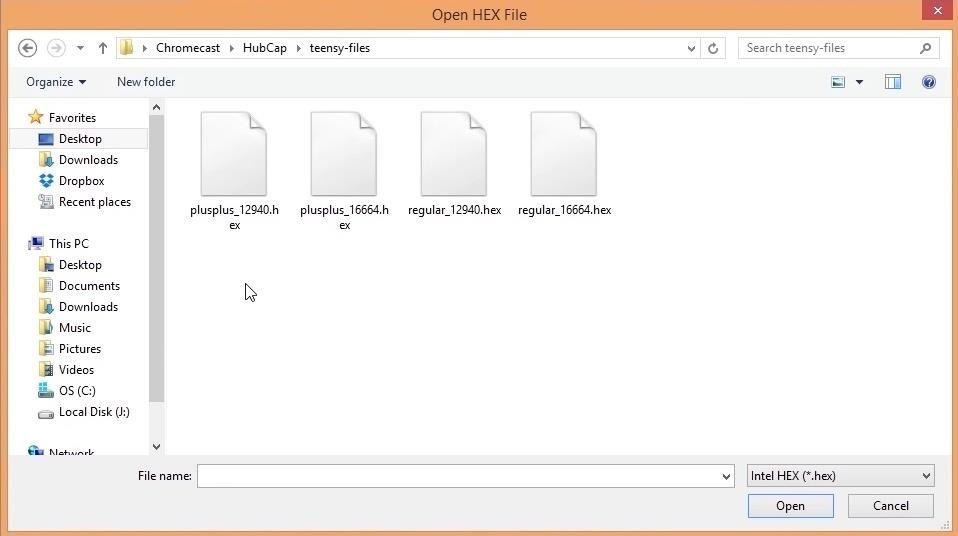
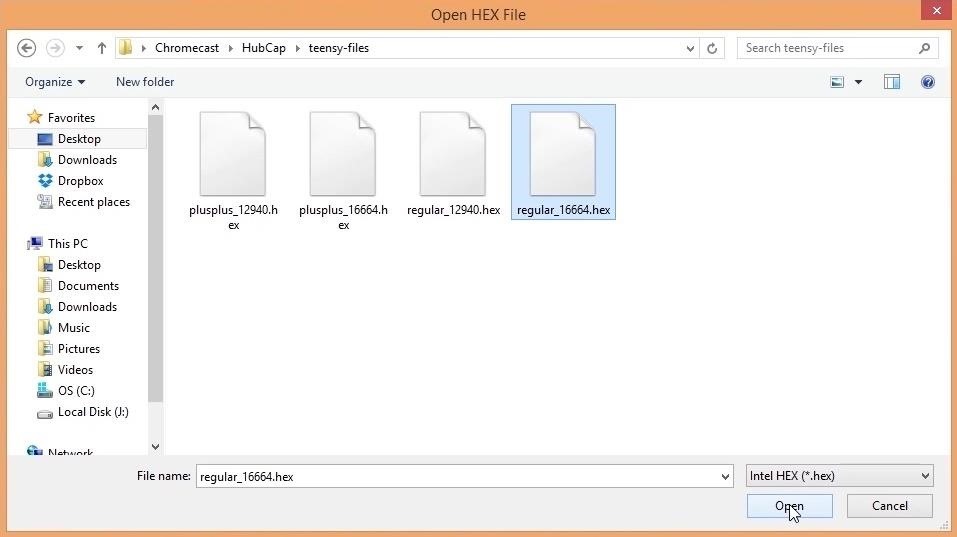
You'll find 4 different hex files in here, and they're each for a different combination of hardware. The two files that start with plusplus are intended for use with the Teensy++. The other two files are meant for the regular Teensy 2.0.
The rest of the file names pertain to your Chromecast software. If your Chromecast is brand new and in-box, use the 12940 file that corresponds to your Teensy version. Otherwise, if your Chromecast is used, go with the 16644 file that corresponds to your Teensy version.
So, for instance, since I'm rooting a used Chromecast with a regular Teensy 2.0, I selected the regular_16644.hex file.
From here, as the screen says, press the tiny little button on your Teensy. It shouldn't be hard to find, as it's the only button on there. Once you've done that, the screen will change.

With that out of the way, click the second button from the right in the Teensy Loader window.
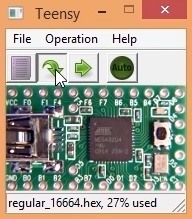
Teensy Loader will flash a Programming progress bar briefly, then a Download Complete message will appear.
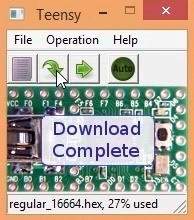
With that done, you can disconnect your Teensy and go grab all of your materials.
Step 4: Root Your Chromecast
Now for the fun part. To begin, plug your Teensy into the USB Mini cable again, then connect the larger end of the cable to the corresponding female port on the USB OTG cable.

Next, plug your Micro USB cable and AC adapter into a power supply. From there, plug the Micro USB into the remaining female end of the USB OTG cable.
At this point, you should only have one free port remaining on your USB OTG cable—the male Micro end.
This end will be plugged into your Chromecast, but before you do that, find the Reset Button (it's located on the side of the Chromecast). Press and hold this button, and keep it held down. When you've established your grip on this button, go ahead and plug the remaining end of the USB OTG cable into your Chromecast. Again, keep the reset button held down.

While you're still holding the button down, take a peek at the Teensy—the light should begin to flash. At this point, you can let go of the reset button on the Chromecast.
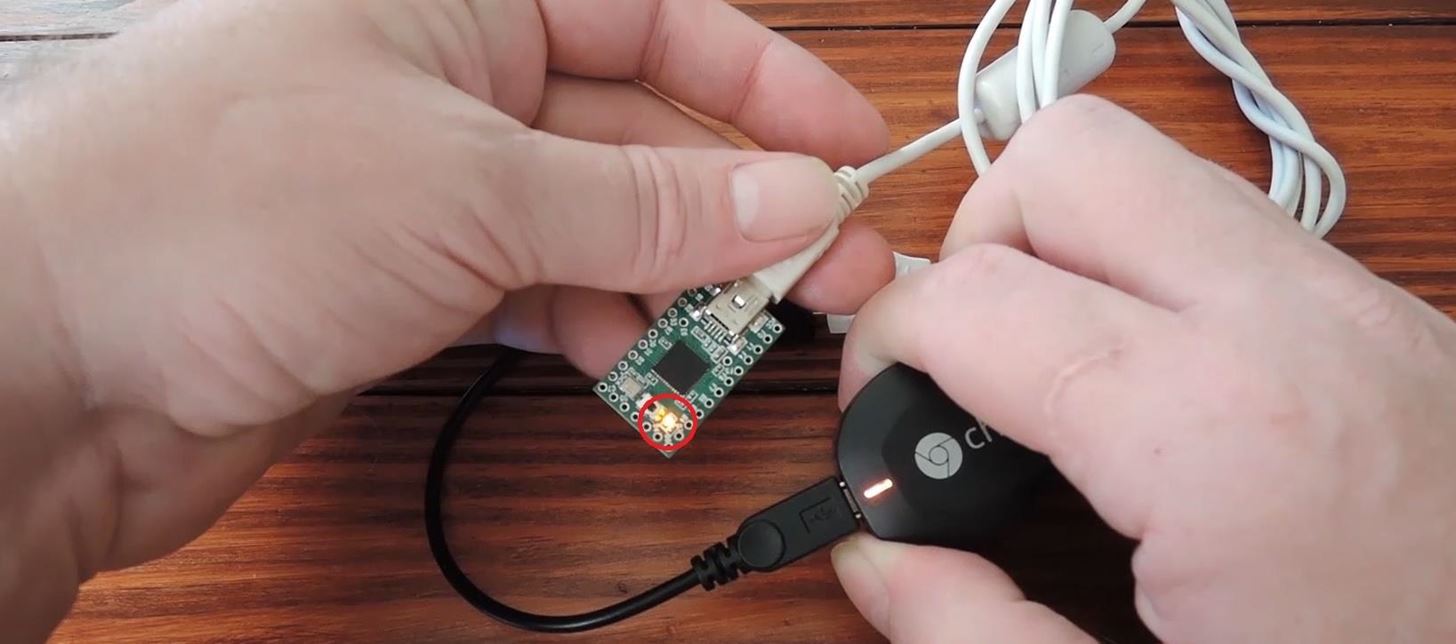
After about 30 seconds, the light on the Teensy should stop flashing. I'd suggest waiting a full minute, then when that time has passed and the Teensy's light has stopped flashing, you can disconnect the Teensy and the USB Mini cable from the USB OTG.
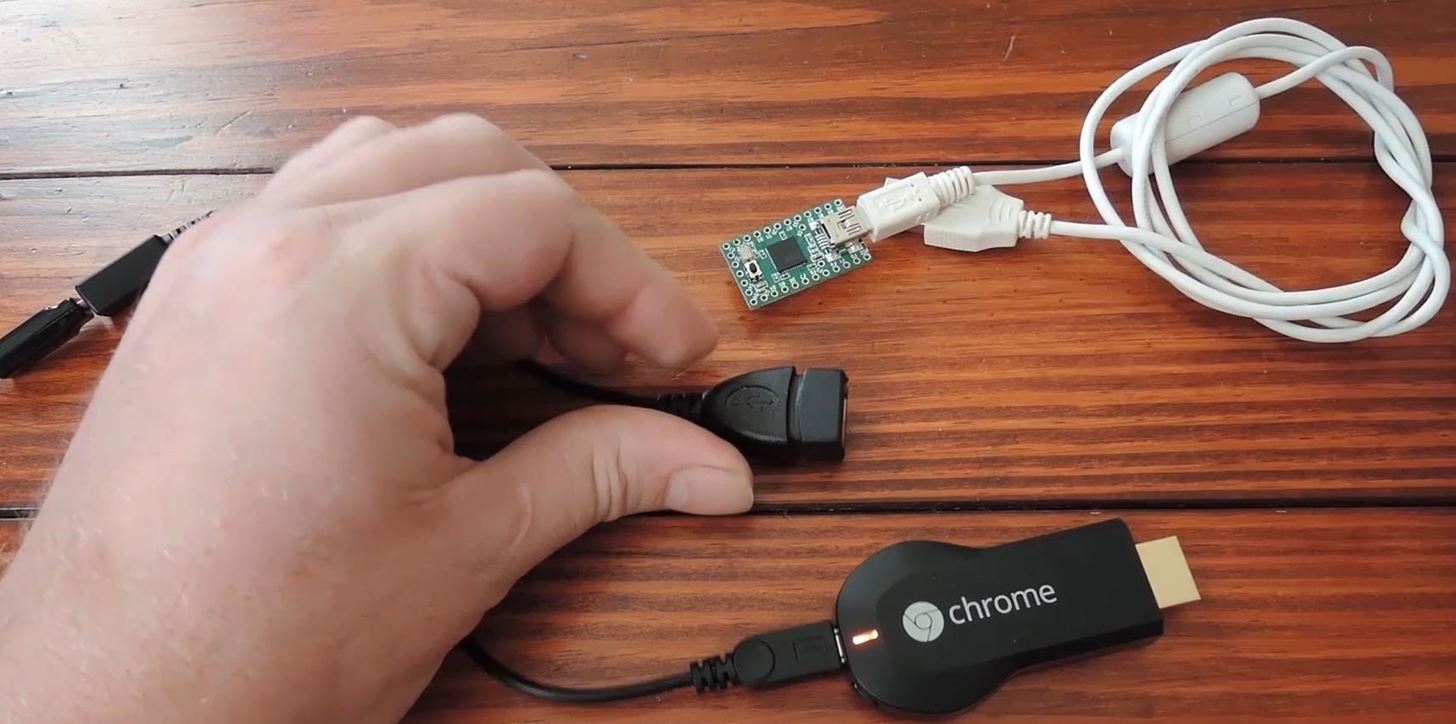
Next, grab the USB flash drive and plug it into the empty slot on the USB OTG cable.
Once you have it connected, just press the button on the Chromecast one time.
At this point, the FlashCast image on the USB drive is rooting your Chromecast and installing Eureka Rom. This process can take as many as 8 minutes, and depending on your Chromecast version, there might not be any indication that the procedure has finished. So, to be on the safe side, set a timer for 10 minutes and walk away.
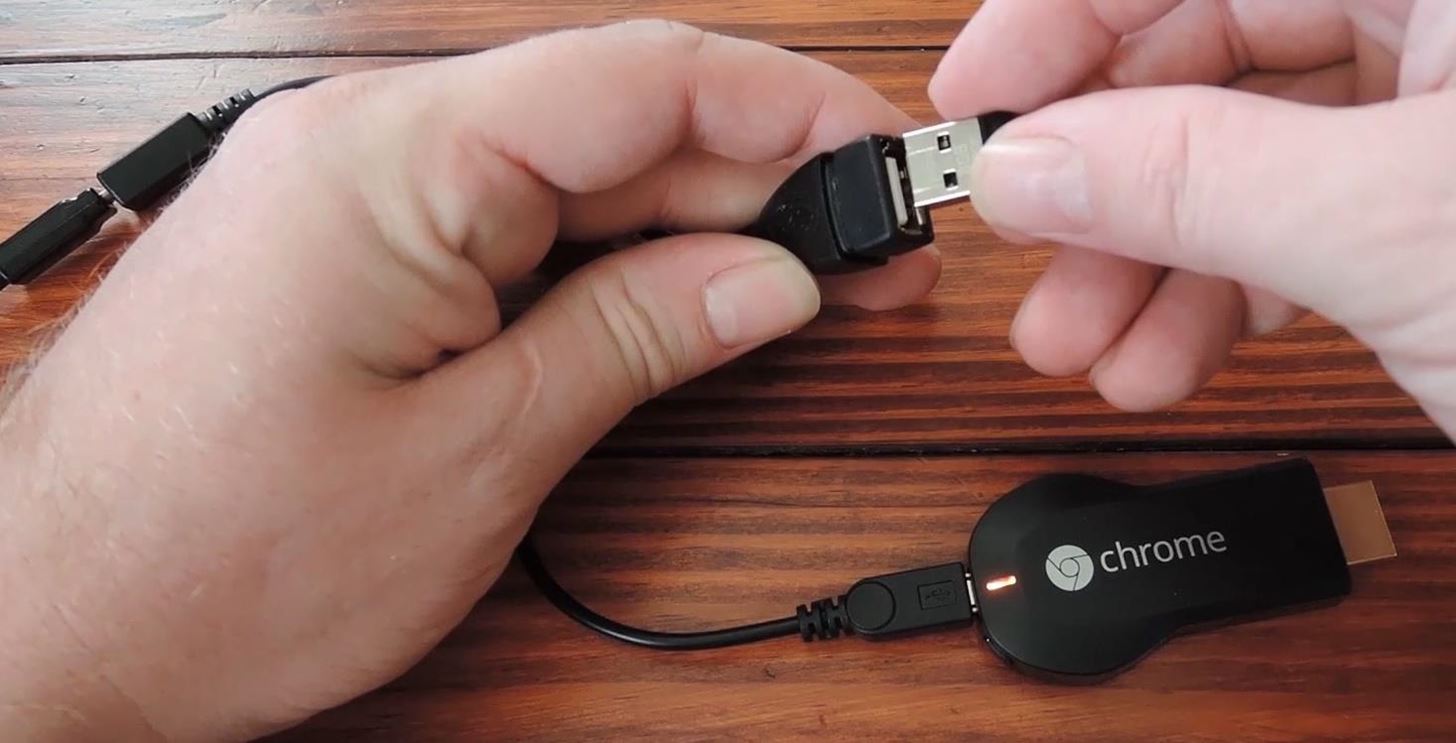
When that time has passed, you can disconnect your Chromecast from the USB OTG cable and hook it back up to your TV. You are rooted at this point!
Step 5: Verifying Root
To verify that you're rooted, open the Chromecast app from your phone or tablet, then tap your Chromecast from the list.
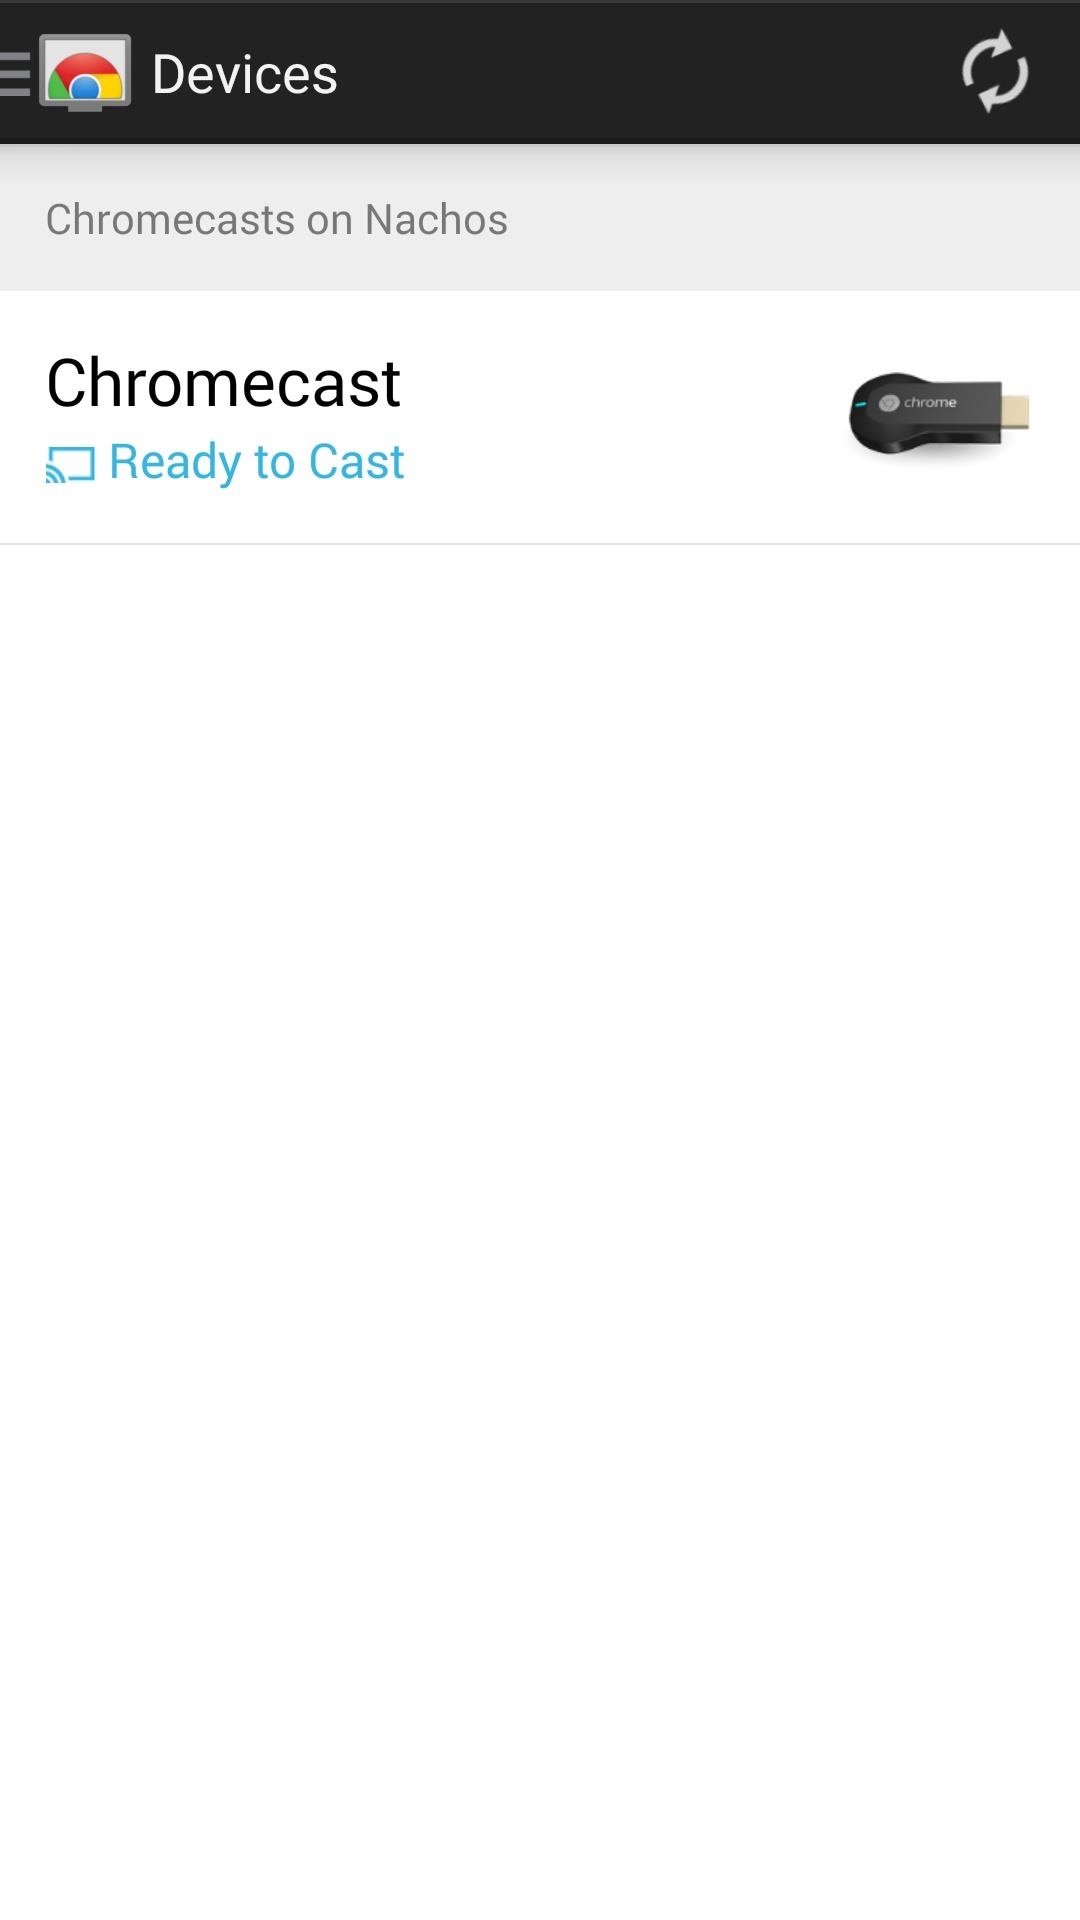
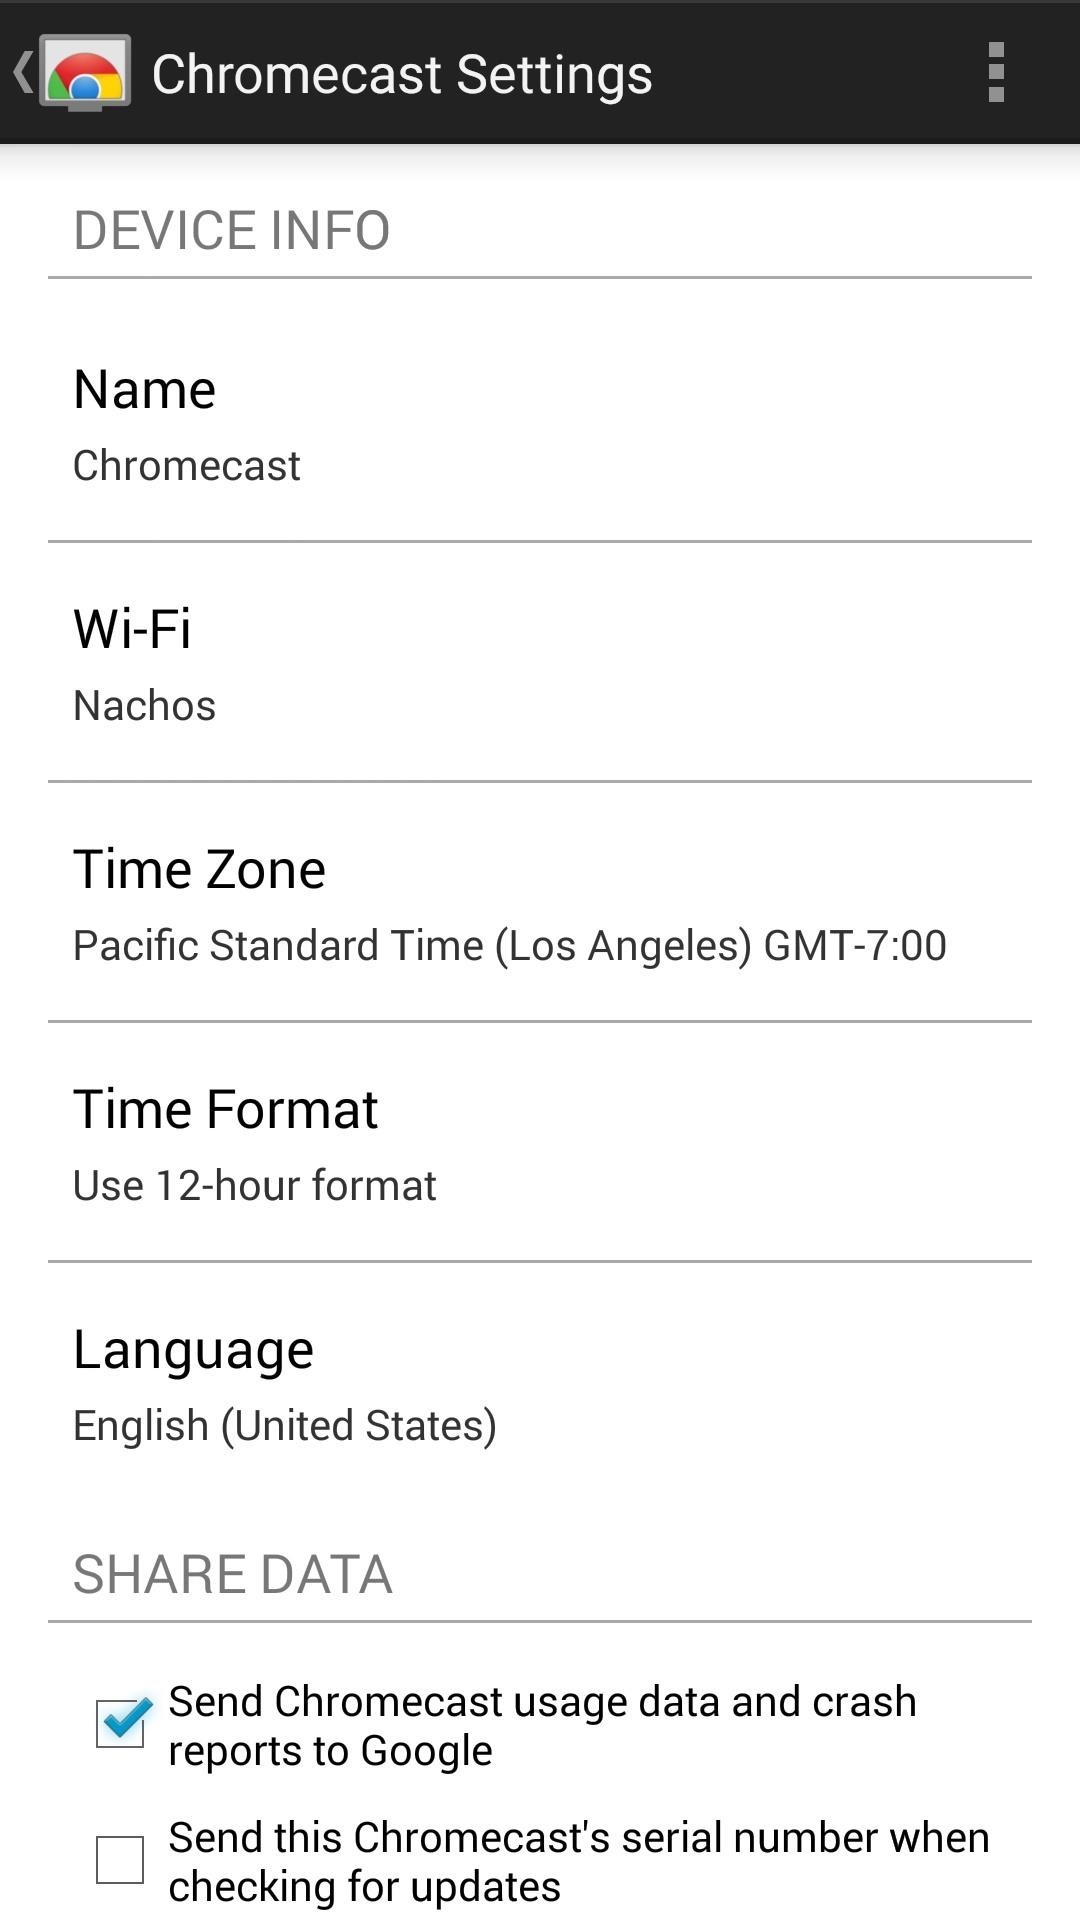
From here, scroll down to the bottom of the screen and jot down your Chromecast's IP Address.
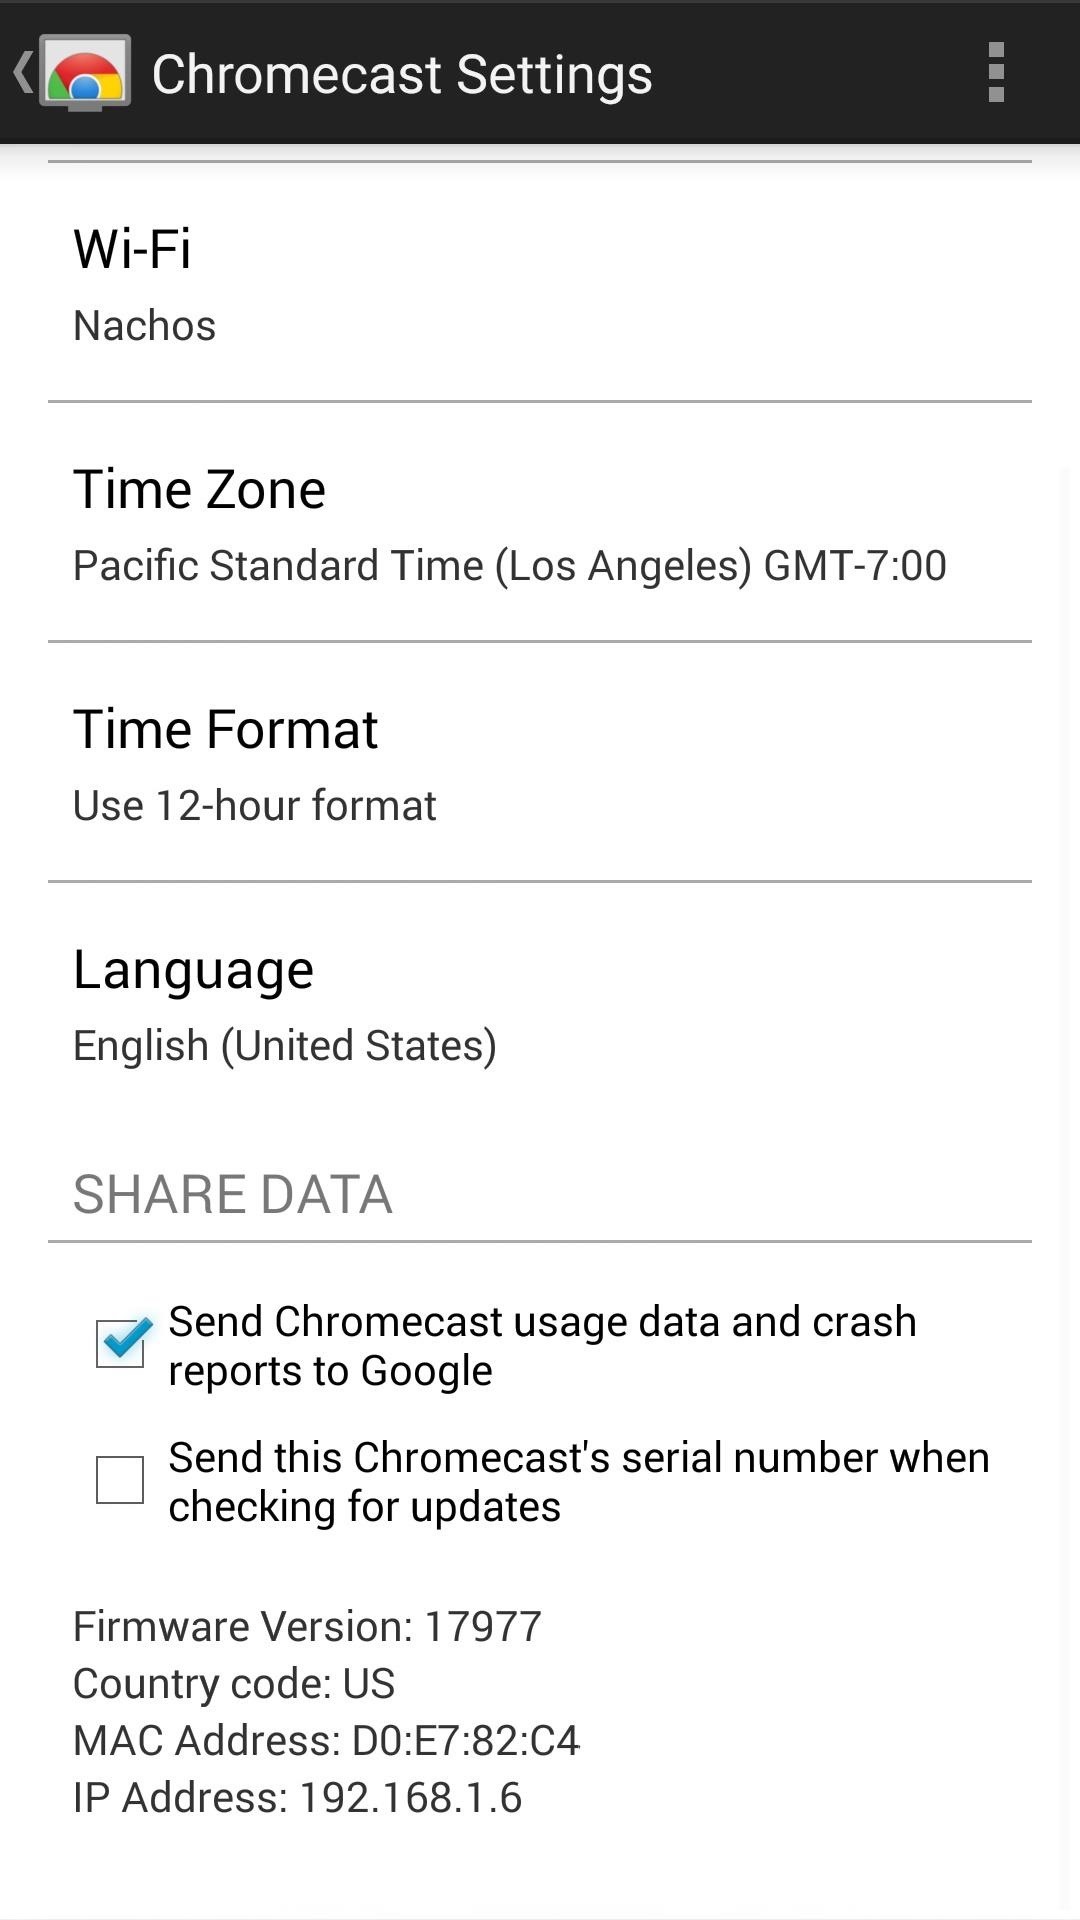

Type this number into the address bar of any web browser on a device connected to the same Wi-Fi network as your Chromecast. If root was successful, you'll see Eureka ROM's settings page.
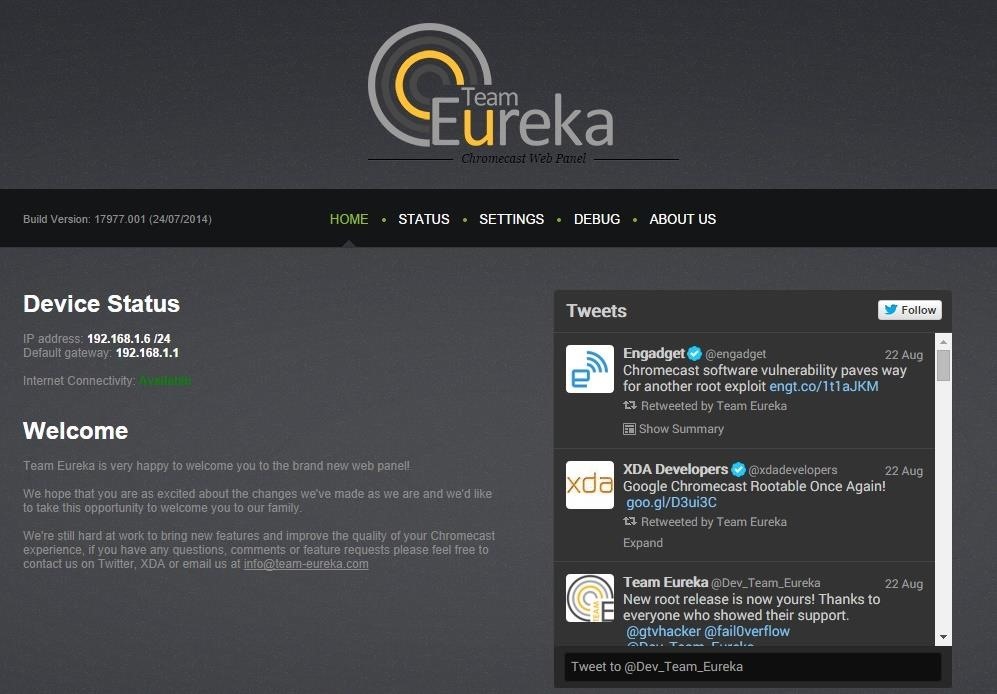
You can use this page to adjust the various new settings that your rooted Chromecast now offers. It might seem like a lot of work for a little extra, but surely the tinkerer inside you appreciates what you've just done.
Just updated your iPhone? You'll find new emoji, enhanced security, podcast transcripts, Apple Cash virtual numbers, and other useful features. There are even new additions hidden within Safari. Find out what's new and changed on your iPhone with the iOS 17.4 update.


3 Comments
You mentioned that this works regardless of firmware version, does this mean even the most recent (26653) is vulnerable?
You went on to load a firmware 16664 on the device, do all current apps work on this version?
Will Google still be able to auto update the firmware of this device and if so, will it continue to work with a custom set DNS?
Thanks for this helpful article.
Just out of curiosity, why can't the ChromeCast be connected to a computer to download the root and LRAM/EEPROM code?
The Teensy looks like it is being used as an intelligent flash drive to force the root, and the normal flash drive to supply the new Lockable RAM (LRAM)/EEPROM code (I don't like calling them ROMs because technically the memory isn't Read Only if you can unlock, and erase/change it at will).
Computers (Windows, Linux, and Apple OSes) have been used like this for years for Android and Apple devices (rooting and new LRAM transfer).
I have a OnePlus 3t and the Oxygen operating system wants to update. However my root guy says I lose root, Su, and generally run havoc with my root. If this is accurate, what can I do in the alternative?
Share Your Thoughts